

This post is nothing more than five screen shots of Windows Media Center in action to get you excited about Windows Media Center integration and Windows Home Server.


If you are not using Windows Media Center you should be. Seriously.
This post is nothing more than five screen shots of Windows Media Center in action to get you excited about Windows Media Center integration and Windows Home Server.
If you are not using Windows Media Center you should be. Seriously.
Fellow Windows Home Server MVP Olaf Engelke has written a brilliant article on how to archive a client PC backup from your Windows Home Server Backup.
Well done Olaf!
Here is the article:
Situation:
You want to clean up the console from not longer used computers, but you do not want to lose the last backup done from that machine. Or you want to preserve an important backup without the risk of losing it in case of a corrupted backup database in the future. Since Windows Home Server does not support archiving, you would either have to save the entire backup database or keep the unused computer forever in the console.
This FAQ describes an unsupported method to archive single volumes from a PCs backup using Microsoft imaging technologies used for corporate deployments. Be warned, that this requires some basic technical understanding of drive imaging and that misinterpreting information given here may have negative effects to your client PC. Also details may vary for the operating system used and for the version of Windows AIK. This FAQ has been tested on a Windows 7 Ultimate client PC with WAIK 3.0.
Prerequisites:
· A running Windows Home Server client PC.
· Windows Automated Installation Kit (Windows AIK), which can be downloaded from Microsoft. Select a version, which is compatible to the client PC on which you want to perform the task.
· Enough disk space on a local disk, an USB drive or a network share to store the archived volume(s).
· The freeware tool GImageX for more convenience.
· The capability to open the backup using the Windows Home Server Console.
Limitations:
· You can only save and restore one volume at time, so saving or restoring multiple volumes is a sequential process. Limitations for restoring to different hardware apply as with Windows Home Server – a restored operating system could fail to boot, if the HAL or the disk layout/needed controller drivers on the target computer are different.
· Without the freeware GImageX you will have to perform all tasks in the command line.
· There is not much consistency checking, so carefully check your selections before applying anything to the wrong target location.
· The Windows Home Server Console on the client must be able to mount the backup and the backup must be completely readable.
Archiving a volume:
1. Download and install Windows AIK on a client PC.
2. Download and extract GImageX.
3. From the folder C:\Program Files\Windows AIK\Tools find the tools for your client OS architecture (x86 or x64) and copy following files to the same folder, in which gimagex.exe is stored:
wimgapi.dll
wimmount.inf
wimmount.sys
WimMountInstall.exe
wimserv.exe
imagex.exe
4. Open GImageX by double click (no installation needed).
5. In the Windows Home Server Console open the wanted backup of a volume you want to archive.
6. In GImageX on the Capture tab click Source and select the mounted volume containing your backup (usually Z:).
7. For Destination enter a path and a file name. The extension of the file is .wim. Wim files are file based images, which offer the benefit against Windows Home Server, that you can restore them also to smaller than the original volumes.
8. Assign a name to the image in the Name field and add a Description for the image file.
9. Select the wanted Compression rate (recommended: Maximum).
10. The other fields and checkboxes are not of high interest for the intended purpose.
11. Click Create to start the creation of the image file.
12. If you want to attach a second backup (i.e. another volume of the same PC) to that wim file, you can do this by clicking Append instead of Create.
Command line example:
If you like to use the command line for creating / appending the image, you can do this by opening the Deployment Tools Command Prompt from Start menu and entering the following commands (adjust them to your configuration):
imagex /capture Z: d:\test\whsbackupxp.wim “XP Workstation Drive C: 01/2010”
Optional to append another mounted backup (assuming again Z: as drive letter):
imagex /append Z: d:\test\whsbackupxp.wim “XP Workstation Drive D: 01/2010”
Hint: If you archive multiple PCs into one image by appending, you will often find, that the image file does not increase that much. This is the result of single instance storage, which stores only one copy of duplicate files.
You can store the created wim file on a shared folder on the server, on the client PC or on external disks and delete the old PC from the console, after you did save all volumes you intend to keep and validate, that your archive works as intended.
Mounting a wim file:
In the most cases you do not want to restore a complete old PC, but only single files or folders. To do so:
1. Create an empty folder on your local disk and open the GImageX tool.
2. Select the Mount tab.
3. Declare the empty folder as Mount Point.
4. Select your wim file as Source. The file can be located on any volume or network share, to which you have access.
5. If you have only one image in your wim file, select image number 1, if you have multiple, you can get the number from the Select dialog (here you meet the name and description from the Capture screen again).
6. Select the check box Read and Write, if you want to add, change or remove files from the wim file, otherwise leave it unchecked.
7. Click the Mount button. After a while (I got the feeling, using the command line tool is performing better) the mounting will be completed.
Command line example:
imagex /mount d:\test\whsbackupxp.wim 1 d:\mount
would mount the first image stored in the file whsbackupxp.wim from the location d:\test to the empty folder d:\mount. For mounting with Read and Write access you would use the parameter /mountrw. Windows 7 users can also use the command line tool dism.
Now you can open the mount point folder in Windows Explorer and access all files, which are stored in the image, dependent from the Read and Write selection copy, change, delete or even execute them.
Hint: Deletion of files and folders does not reduce the size of the image automatically. You would have to export the image to a new wim file to get a smaller image file after committing the deletion.
Unmounting the wim file:
After completing the operations you should unmount the wim file:
1. Close all open instances of the mounted image in Windows Explorer or command prompt.
2. On the Mount tab in the Unmount section select the mounted image(s) and click the Unmount button.
3. If you wish to save changes in an image mounted as Read and Write, select the Commit Changes checkbox.
Command line example:
imagex /unmount d:\mount
would unmount the image file from the mount point. The additional parameter /commit would be needed to finally write any changes made directly in the image.
Performing a full volume restore:
Bare metal restore is one of the powers Windows Home Server offers to end user. A wim file can also be used to perform this task:
1. Attach the disk, to which you want to restore the data, to the client PC as secondary drive or using an USB to IDE/SATA converter cable.
2. Create the volumes you need on this disk either by using disk management console or the diskpart command. If there are already volumes on the disk, it is recommended to format these volumes before starting a restore to them. The size must at least match the size of the total amount of data to restore.
3. Open GImageX and select your wim file as source.
4. As destination select the drive letter (or an empty folder), to which you want to restore all files from the volume.
Attention: Be carefully, because a wrong target selection can mess up the selected target volume. So it is not a good idea trying to apply the image to the current C: drive or another disk with data on it (with the exception of an empty folder as target).
5. Select the proper image from within the wim file to restore.
6. Restore further images to additional volumes on the disk, if needed.
Command line example:
imagex /apply d:\test\whsbackupxp.wim 2 f:\
would restore the second image stored in the file whsbackupxp.wim from the location d:\test to the root of a volume, which uses the drive letter f: in the currently running operating system.
If you want to boot a PC from the restored disk later (or try at least, if the hardware does not match the original configuration any more), set the volume active either in the Disk Management Console or with diskpart:
diskpart
select volume f: (use the drive letter assigned to the volume, which you want to make active)
active
Attention: Selecting the wrong partition here may render the current PC unbootable.
Hint: If you have a license of Windows 7 or Vista, you could also create a Windows PE based boot medium, copy the mentioned files to that medium and perform the restore from there directly on the target PC (assuming the drivers to access the disk are loaded (which is likely in Windows 7 PE), the volumes are created with diskpart or are still existing) and the wim file is accessible from a local drive or via mapped network share. For this you can use the cmd prompt in Windows PE, which can be opened with the shortcut Shift + F10.
Best greetings from Germany
Olaf Engelke
Well in keeping with Tim’s naming convention I will name this build Ceton Megatron
Contrary to the name this ITX Build is small but handle my demands with ease
Due to my lack of time I will condense this build explanation to an all in one
Case: Lain Li PC-Q07 I looked at the PC-Q08 but I like this one better


I Chose the Zotac 9300 ITX


I put an Intel E7500 2.8 Core 2 Duo CPU 45nm overclocked to 3.1 @ 37C Idle

Last week we brought you the first details on Tranquil PC’s SAFE Windows Home Server.
Over the weekend, Tranquil PC have release more information, and more SAFE Windows Home Server articles on the Green-PCs site.
The Safe Server Module (SSM)
The SSM is designed specifically to be housed in a SQA-5H Home Server.
(It may be possible to fit it to other Home Servers too)
It comes delivered with 2x 500GB 2.5” HDDs, prepared in a RAID1 mirror array, including a Tranquil build of Windows Home Server (PP3) for either the Series 1 or Series 2 SQA-5H.
It can simply be added to an existing SQA-5H – and the Server initialised again (loosing the DATA), or you can Restore the Home Server with the supplied new DVD, with the SSM fitted and recover your DATA *
Priced at £169.00 + VAT, the SSM represents excellent value for money, bearing in mind the system protection it offers, and ease of replacement of the primary (OS + DATA) HDD. You also will receive a desktop application to help you to monitor the SSM, and also setup email messaging to alert you to the status of the SSM. You will also be able to re-use your existing HDD1 as a server storage or backup drive ! As a thank you for purchasing, you will also get a licensed copy of the AVA Media CD ripping engine too on the Restore DVD and SSM
The SSM is available from 1st February 2010, and can be ordered on-line here
What’s in the box
Available for :
The SQA-5H-SAFE Home Server
This is the world’s first OEM Home Server fitted with the innovative Safe Server Module (read all about the module here). Ensuring that all your data, as well as the operating system is protected. It’s a fine mix of the latest Windows Drive Extender (DE) technology for extendable / flexible / safe data storage blended with the established hardware RAID technology to protect the OS and primary data hard disk. Priced at £569.00 +VAT

Features :
The SQA-5H-SAFE is available from 1st February 2010, and can be ordered on-line here
What’s in the box
Windows Home Server PP1, 2 and 3 pre-installed
Media Pack, with Start-up CD, Restore CD, Restore DVD and USB boot key
AVA Media CD ripping engine
iTunes Server
Logitech Server
Safe Server Module Monitor
Available in English / German / French operating systems
Notes :
* – take care that you have enough spare capacity – ie the SSM is a 500GB device, if you have a SQA-5H-3000 with 2x 2TB HDDs fitted, and BOTH are pretty full, you will not be able to provide 100% folder duplication (initially) until you have set up the SSM, then re-added the second 2TB drive as a new pool device.
Full advice is provided with the SSM, on how to install / upgrade existing Home Server installations
** – Series 2 Home Servers were introduced on January 5th 2010. If you bought a SQA-5H before that date it will be a Series 1
The are a number of articles on the site, including detailed information on the module and how to use it.
We hope to get our hands on one of the modules shortly for a proper review – so watch this space.
Test the SSM in a non Tranquil Home Server ?
The SSM is designed to drop into the SQA-5H HDD caddy. It has not been tested yet in other Home Servers, i.e. HP, Acer, etc Home Servers –if you have a non Tranquil OEM Home Server and are based in UK, and would like to test / evaluate the SSM in your device – please contact research@tranquilpc.co.uk – we will discuss supply of a ‘blank’ SSM (no Tranquil Home Server OS) – whereby you can run your OEM Home Server Restore application, to image the SSM. Please note there would be no SSM Manager application / service running. The purpose of the test is to ensure physical and BIOS compatibility only – the SSM will otherwise function as any HDD1.
My Internet Explorer crashed all the time. I mean crashed a lot. I could not explain it (or fix it)and since it had been doing it since right after the fresh OS install I was very frustrated. Performance was poor and the messages were driving me crazy. Does this happen to you? Do you happen to use Skype?

My original article for tuning up Internet Explorer can be found at:
https://moviesgamesandtech.com/2009/11/25/now-we-know-internet-explorer-self-help/
So, this morning Windows 7 finally gave me the answer. It had never specified Skype was an issue before today. This is just the add-on of course and not the Skype program.
24 times? Yeah, time to disable it. I would have never thought this was the issue and I do not know why Windows 7 did not tell me before. I have had this OS since October 22!

Tools>Manage Add-ons:

All fixie. No crashes all day. If you use the Skype Add-on then you might want to leave it alone but I do not want it! Again, this is the just the Add-on and not the Skype application.
Check it out for yourself and fix your Internet Explorer!
Now We Know,
Tim
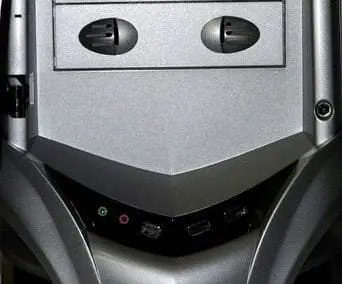
This is the fourth of five (?) articles about my Windows Media Center build in anticipation of the new Ceton CableCARD tuner release. Tonight I will be talking about the assembly and video card installation in the Alienware P2 Chassis.

The plan is to have this system replace my Moxi Charter Cable DVR AND my WMC PC.
The three previous articles can be found at:
The chassis is a Alienware P2 case with light kit.

I get paid every two weeks and get a few items each paycheck. I should be done in January, well before the March Ceton release. This paycheck I bought the video cards.
I am naming her Ceton Prime in honor of the Ceton Multi-Channel Cable TV Card scheduled for release on March 31, 2010.
http://www.cetoncorp.com/buy.php
$124.99 for the 9800 GTX from TigerDirect and $134.99 for the 9800 GTX + from Newegg for a total of $260.
The amount spent so far is $260+$434+$355+$225 for a subtotal of $1,274 (no tax). Not too bad.
I am going to load the OS and get it running for the next article.
Tim
This week saw the release of a new Windows Home Server Add-In called Home Server SMART from Dojo North Software.
What this add-in does is monitor the health of your hard drives in your Windows Home Server.
Here is what what Dojo North Software have to say:
Home Server SMART is a Windows Home Server (WHS) add-in that enables you to monitor the health of most of your hard disks attached to WHS. Home Server SMART examines the S.M.A.R.T. data exposed by your disks and determines the health of the disk. If problems are detected, Home Server SMART informs you which attribute(s) are critical or problematic, and it presents a summary of problems found. If the problems are serious, Home Server SMART will make a recommendation to you that you replace the disk.
Disks that are connected via IDE (PATA) and SATA (including eSATA), support Self-Monitoring Analysis and Reporting Technology (S.M.A.R.T.) and report that S.M.A.R.T. data via the standard Microsoft storage driver (most modern PATA/SATA drives do), are fully supported. Unfortunately, since neither USB nor IEEE 1394 (FireWire) attached disks report S.M.A.R.T. data in a standardized manner, Home Server SMART cannot read S.M.A.R.T. data from them. However, it can read the standard Microsoft storage driver “failure predicted” flag, and USB/IEEE 1394 expose this, so if the storage driver detects a potential problem, Home Server SMART will alert you to it.
Simply log into the WHS Console, select the Home Server SMART add-in and immediately see all installed/connected disks. Click on a disk to see more details about the disk.
Need help? Find a bug? Want to see a new feature? Check out the Dojo North Software forum!
INSTALLING
Installation the add-in was very simple and is just like installing any other add-in for WHS.

USING HOME SERVER SMART
Once you have installed the add-in, when you restart the WHS Console you will see a new tab called Home Server SMART.

When you click on this tab you will be presented with a list of your hard drives which you can click on one by one to see the results.
Here is my first hard drive – and yes, I have problems with it (I have to say I am not very happy about this fact as it is a fairly new HP DataVault X510 so for the primary drive to be failing already is not a good thing!).

The second and third hard drives are fine (phew!).

You can also click on a drive and then select SMART status to get more information – as you can see my primary drive has some problems where as my others don’t!


There is also a very good Quick Help function which explains everything.

FINAL THOUGHTS
I think this add-in is great – it’s really easy to install and use, and frankly who wouldn’t like some notice about possible drive failures (I have had a few over the years and surprisingly enough they never happen at a good time!).
Best of all this add-in is free – although as the author says “Treat Me to a Starbucks Frappuccino”.
I think this is a must have add-in for any Windows Home Server.
All I have to do now is decide what to do about my dodgy primary drive!
To learn more about Home Server SMART, and to download it, click here.
Kris has been hard at work on his award winning add-in, P80. This new release includes a bug fix or two in it and also has some new features that people have been asking for. Here is what Kris has to say about the new release.
a. Public – Anyone can login to P80
b. WHS Users – Users who have remote access turned on can use P80 (default and what you have been accustomed to with P80)
c. Private – Only selected users can access P80. If they are not allowed the webpage goes nowhere if the P80 link is clicked.
d. By Pass – Allows users to completely skip the login process of the WHS Website and use Windows Authentication instead to log into P80 via bookmark.
If users are currently logged in and security is changed to private and they are not allowed, they will get kicked out on the next refresh of their screen
Other features in this new release.
2. P80 now looks for specific words in the descriptions, the field above the computer name for windows machines, for the computers/laptops/servers/etc on your network. P80 will then display the appropriate graphic in the summary screen for that item. Keywords: Laptop, Netbook, Server, Desktop, Workstation, Notebook. If for example you have a severs description as “HP G4 Server – Gaming”, then the server would have an icon displayed as a server in the computers section of the summary screen.
3.Torrent Downloader – For users who have a torrent application that monitors folders on their WHS for new torrent files. Enter in the folder name in the config screen of P80 and then copy \ paste torrent URL in the torrent section of P80’s summary screen. NOTE: Torrent sites that require username/passwords do not work. This will be in the next version. Also make sure your torrent URL has .torrent at the end.
![P80_thumb6[1]](https://i0.wp.com/moviesgamesandtech.com/wp-content/uploads/2010/01/P80_thumb61.png?ssl=1 "P80_thumb6[1]")
Known Issues
2. Torrent Watcher does not work with sites that require user names or passwords.
I want to make a note here so people don’t go crying to Kris. IF you set P80 to Public then be aware that ANYONE on the web can get in your WHS and use AutoExit to shut down/reboot/services on any machine on your LAN! Personally I can not see why you would want to enable Public but it is a feature people asked for so Kris made it available for those users. You’ve been warned!
Kris ask me to pass along some thank you’s too. First to everyone who voted for P80 in the varies WHS web site polls. He is very humbled and thankful. Sam Wood, you are the man. Masahiko Sada, a Japanese WHS MVP for presenting P80 at conference and getting it in a Japanese magazine. Franz Post for the German translation. Wearyeyed for the idea of P80 outside of the WHS web site and this months hot tub payment.
The new release can be found here. Support forum can be found here. The P80 blog can be found here.
fasthair
UPDATE (26/01/10):
Kris has released a bug fix for P80 for French/German users.
The new file is here… http://cid-3eccee382d93ca82.skydrive.live.com/self.aspx/.Public/P80.2.6.7.zip
Have you tried to restore a Windows 7 computer from your Windows Home Server and had some strange problems?
If so, then you might want to read the latest TechNet article posted by Microsoft called Windows 7 may not start after you restore the operating system from a restore point on Windows Home Server. The Article ID is: 979499.

After you restore Windows 7 on a home computer by using a Windows Home Server Home Computer Restore CD, the home computer may no longer start as expected.
This issue occurs if a hidden system partition is not present on the computer at…
This issue occurs if a hidden system partition is not present on the computer at the time that you restore Windows 7. By default, a hidden system partition is created during the Windows 7 installation. Windows 7 cannot start without this partition.
Note If the original Windows 7-based computer did not contain the hidden system partition when you backed up the computer to the home server, this issue does not occur.
To resolve this issue, you must restore Windows 7 on the home computer again, and then create the missing system partition during the restore process.
To do this, follow these steps:
Note Before you start the restore process, your home computer must be connected to the home network by using an Ethernet network cable. In most cases, you cannot use a wireless connection.
The solution is very simple and is worth checking out, and the article has a few additional pieces of information.
Click here to view the full article.
Ian over at the Digital Lifestyle.com has released the Media Center Show Podcast, number 240.

Here’s what Ian has to say about this weeks show:
This is the final batch of interview from CES. I have Arcsoft talking about how to get 3D movies in Windows Media Center using Total Media Theatre, they have some great solution for movie watching in Media Center including HD audio and upscalling. Of course 3D requires special hardware and so I talked with Nvidia about the hardware needed to get 3D working on the PC.
The Zune team where at CES talking about the progress they have made over the last year including launching the Zune HD and the Zune marketplace in the Xbox 360, so I talked to Michael Yaeger from the Zune team about the current state of Zune
Garry took a trip down to see Pronto from Phillips about their remote control devices including devices that can control Sonos systems.
The final section wraps up the week with a chat with Bjorn Morris from Cybersmart systems who had his first trip to CES and we find out what caught his eye at the show
Plus I also have a roundup of the weeks news and I want your feedback on the next UK user group event
So, go take a listen, especially if you are interesting in attending the next UK user group meeting – the last one was a blast!
As usual you can listen to it here.
Last Tuesday I had an issue with the Restore of a 64-bit Dell Inspiron 15. After starting the Restore, and loading the proper Dell 64-bit network drivers, the process stopped when the WHS was not found. I have done about a dozen Restore (32-bit) with WHS but this was the first one to hang up on me. Why?

A special thanks to fasthair and Seth for confirming that this error happens in similar scenarios.
For this Restore I was using the Power Pack 3 CD image and the latest and greatest 64-bit drivers from Dell on my USB stick. Everything should have been working as it has the past 12 times. It was not. Ugh (Insert Google rejected curse word here)!

–
I downloaded the 32-bit Windows 7 drivers and started again. The video has been updated. Here it is:
–
I tried for a few hours to get past the Server not found error and finally decided I would start looking around for a solution. I knew the issue was with the drivers because this laptop could not get on the network. How could I tell? I connected to the router from another PC and saw that it was NOT connected even though this laptop was hard wired. Crap.
When I went to download the Microsoft Technical Brief to verify the process I came across the following warning:
“If you are restoring from a 64-bit computer the drivers that are stored in the backup will be 64-bit. These will not function with the 32-bit restore CD. Therefore it is may be necessary to obtain 32-bit versions of the network driver and storage-device drivers for your 64-bit computer, while doing a restore of your home computer.”
The full brief can be found at:
–
I was fortunate enough to spend some time with Jason Ludka of SiliconDust while at CES 2010. SiliconDust is the company that brought you the HDHomeRun tuner series. As if those products were not enough, SiliconDust is now about to introduce their CableCARD dual tuner. Check out this 5 minute interview to find out more about this amazing product!

–
The tuner at the show was a working demo and Jason tells us the actual unit (part number HDHR-CC) should be similar in size to the current models. Being a current CableCARD Windows Media Center user I am really excited to see a product like this!

–
The video quality was not the best since it was on my phone but the audio is the important part of the interview anyway!
As a review, some quick specs are as follows:
More information about SiliconDust and their products can be found at:
I will be posting more on this unit (and hopefully a review) as soon as I get detailed specs from SiliconDust. We also expect to hear more from the company in April when their beta testing program starts.
Tim
Dave and the guys over at the Home Server Show have released podcast number 73.

I haven’t listened to it yet so I don’t know if I’m on this weeks show or not – I’ve been on the last few 🙂 I hope this week’s show doesn’t just end like last weeks did!
Here’s what Dave has to say about this weeks show:
The Home Server Show 73 – CES and Blog Post Wrap-Up
On Today’s show John, Jim, Chris, and Dave try to wrap up our CES talks and go over some of the posts on homeservershow.com. We also talk about some new Add-In’s and critique Dave’s podcasting voice! Barry White not included. Also, listen in for the debut of a new Add-In by ASoft called Admini-Me.
Add-In: Admini-Me
Initial thoughts and features of Admini-Me.
Add-In: MyMovies 3.12
Add-In: Asset UPNP
Add-In: Conflict Resolver
As usual, you can listen to it here.
Hot on the heals of various announcements this month, Tranquil PC have started to give some hints on a new project they are working on called SAFE Home Server.
There isn’t much information at the moment, but knowing Tranquil it will be something interesting, useful and worth the wait!

Here’s the little information they have released so far…..
For sure, your Home Server ‘data’ – the important stuff, is safe as long as you have more than one Hard Disk Drive (HDD) fitted to your Home Server, and folder duplication is enabled. Tranquil will always recommend at least two HDDs are always used on Home Servers, unless you use off site backup services too.
Also the primary HDD containing the Operating System (OS) partition is safe, due to the simple way that a Home Server can be ‘Restored’ over the network (another great solution from the Microsoft Home Server team) even if the HDD fails (physically).
However, due to the nature of the Restore process, certain things are lost – ALL the DATA can be recovered safely from any Duplicated Folders, but any specific user settings / folder access permissions etc and installed Add Ins / application software installed on the Home Server is lost. This is not often a problem to the home user, but in a small business environment (where down time / rebuilding would cause an problem) it may be critical.
Tranquil R&D team have agonised over how to create / supply a hardened Home Server product – ie one that is as ‘SAFE’ as possible, safe from ALL HDD failure, even protecting the Primary HDD. This short series will explain the issues, the opportunities, and the final solution – the “Safe Home Server”.
Watch this series as we build the world’s first OEM ‘Safe Home Server’
So, if you want to follow this series, and learn more about a SAFE Home Server, click here.